snack

Spiced Sweet Potato Wedges + Avocado Superfood Dip

Spiced-sweet-potatoes-featured-image.jpg

There's something about sweet potatoes. Don't you love them? I do! Sweet potatoes are the healthy alternative to regular potatoes because they actually pack a punch of essential vitamins and minerals. They are anti-inflammatory and help balance blood sugar. The words 'yams' and 'sweet potatoes' are often interchangeable. They are actually two different vegetables, but are both great options.

Staying clear of all whites is always best (white breads, flours, sugars, etc.), but there is an exception... Japanese sweet potatoes. They are white-light yellow inside and have a purple skin. These are actually the most nutrient dense of all sweet potatoes. So enjoy your sweet potatoes/yams, especially the Japanese ones!

Spiced Sweet Potato Wedges

Ingredients

2 sweet potatoes, peeled and cut into wedges (I used yam & Japanese sweet potato)

2 Tablespoons melted coconut oil

1 teaspoon chili powder

1 teaspoon cinnamon

1 teaspoon turmeric

Pinch of cayenne

Sea salt and black pepper, to taste

Procedure

  1. Preheat oven to 425 F.
  2. Place sweet potato wedges in an oven safe dish.
  3. Combine coconut oil and spices in a small bowl and drizzle over potatoes. Mix to coat well.
  4. Bake for 25-30 minutes, until tender. Turn broiler on towards the end if you want them crispy.
  5. Serve with avocado superfood dip (recipe below).
Spiced sweet potatoes

Avocado Superfood Dip

Ingredients

1 ripe avocado

2 Tablespoons raw tahini

1 teaspoon spirulina (I use HealthForce brand)

1 teaspoon raw honey

Juice of 1/2 lemon

1/2 cup water, or to desired consistency

Procedure

  1. Place all ingredients in blender and blend until smooth. Garnish with fresh herbs and enjoy.

What's your favorite way to eat sweet potatoes? Share your creations and recipes below or on social media with #apurifiedlife

Herb & Seed Crackers

Seed-crackers-featured-image.jpg

I used to be a huge fan of Mary’s Gone Crackers, until I came to realize that I could easily make my own with a blend of seeds of my choice. Delicious, nutritious, gluten-free, soy-free, and so simple to make. What more do you need? These herb seed crackers are the perfect make ahead snack to have for the week (although they might not last longer than 2 days). Enjoy them with a spread of avocado, hummus, nut butter, or pair them with a salad for a quick lunch.

Seed crackersIngredients

1 cup ground flax seeds/flax meal

1/2 cup raw sunflower seeds

1/2 cup raw pumpkin seeds

1/4 cup raw sesame seeds

3 Tablespoons chopped fresh rosemary

Pinch of sea salt

Pinch of black pepper, optional

2 cups water

Procedure

  1. Preheat oven to 350 F.
  2. Place all ingredients in a large bowl and combine well. Let sit for 10-15 minutes, until thickened but still pliable.
  3. Divide mixture into two baking sheets lined with parchment paper. Spread evenly into a thin layer, about 1/4 inch thick. Bake for 30 minutes. Flip over and bake for another 20-25 minutes, until browned. Let cool and break into pieces. You may also score them before putting in the oven if you want perfect shaped crackers.
  4. Store in an airtight container for 3-5 days.

Note: You can use any fresh herb or blend that you like. My favorite is rosemary. 

What herb will you add to your crackers? Be creative and share with me what you come up with.

Raw Chocolate Macaroons

Chocolate-macaroons-featured-image.jpg

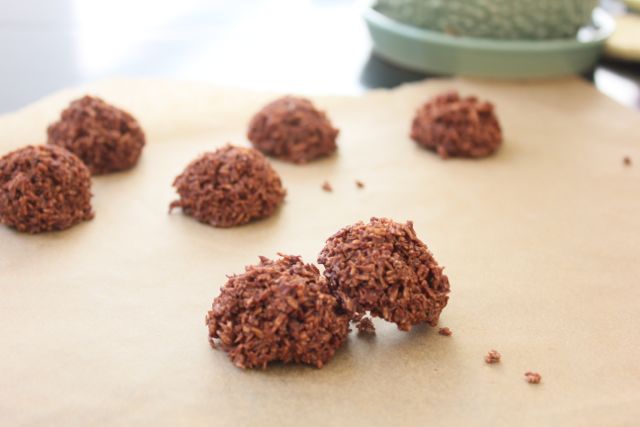
The best things come when you least expect them. I wasn't even thinking or craving chocolate, but these sweet things snook up on me as I was standing in front of my pantry in search for something to do. These raw chocolate macaroons pack a punch of vitamins and minerals and are gluten-free, nut-free, and dairy-free. They're a quick little treat to boost mood and energy. Honestly addicting.

Enjoy!

chocolate macaroons 1

Ingredients

2 cups unsweetened shredded coconut

1/2 cup raw cacao powder

1/2 cup melted coconut oil (measure after you have melted it)

3 Tablespoons coconut nectar (I use Coconut Secret)

1 teaspoon pure vanilla extract

pinch of sea salt

Procedure

  1. Mix all ingredients in a bowl. Tightly pack mixture into a Tablespoon measuring spoon and gently drop it over a plate or baking sheet lined with parchment paper. Repeat with the rest of the batch.
  2. Freeze for 1-2 hours. Let sit for a few minutes out of the freezer before serving, but don't leave out for too long or they will melt.

Makes ~20

These would be better if dehydrated with a dehydrator, but I don't own one. I encourage you to use it if you do.

Tell me, how do you relieve stress? What methods do you use to keep your focus? 


Sunflower Seed Butter

Sunflower-butter-featured-image.jpg

A few months ago I discovered that I am sensitive to nuts. I know, I felt like my life was over, especially since I was the almond butter queen. I had it every single day and more than once. Perhaps why the sensitivity flared. I used to often get bloated and gassy after eating nuts but never thought anything of it since it wasn't every time or I just wasn't aware enough to make that connection. It wasn't until I did a thorough elimination diet/detox (similar to my 3-Day Detox Plan) that I realized that indeed nuts where causing stomach bloating and inflammation. So although they're packed with nutrients and have great health benefits, my body does not agree with them anymore. And that's okay because there are so many other foods that I can get those nutrients and snack fix from. It's just a matter of getting creative, there are always alternatives.

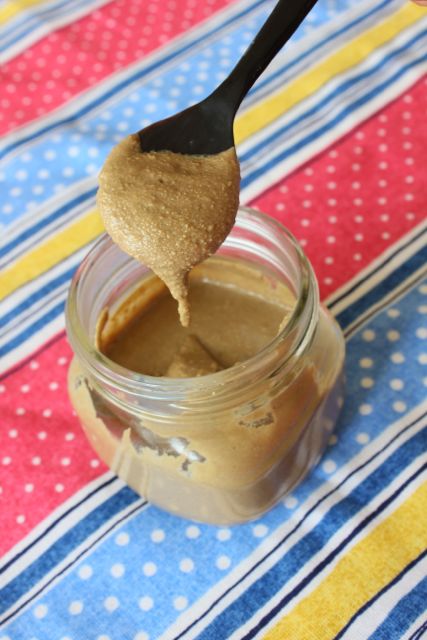
So I discovered this delicious and creamy sunflower seed butter. If you already purchase sunflower seed butter, do yourself a favor and make your own at home. It is so much better than the store-bought kind and doesn't contain refined sugars and other unnecessary additives. Always read your labels.

IngredientsSunflower butter

4 cups raw sunflower seeds

2 Tablespoons melted coconut oil

1 teaspoon pure vanilla extract

pinch of sea salt

Procedure

  1. Preheat oven to 350 F.
  2. Place sunflower seeds on baking sheet and toast in oven for 6-10 minutes, until slightly golden. Check at 6 and 8 minutes. It's important to keep an eye on them because they burn easily.
  3. Let cool for 10 minutes and place in food processor. Process for about 7-10 minutes. The seeds will release their oils and go from a flour, to a crumbly, to a creamier consistency. Be patient, it takes time. At this point, with the processor still running, add remaining ingredients and process until it reaches desired creaminess.
  4. Transfer to jar and keep at room temperature or refrigerated for up 2-3 weeks.

Makes ~ 2 cups

Let me know how yours turns out! Share below or tag me in your picture #apurifiedlife


Chia Pudding [Video]

APLChiaPudding1.jpg

If you know me, you know I love my chia pudding. It's a very easy and tasty energy boost. Chia seeds are packed with fiber, omega-3, calcium, protein, and antioxidants. Chia pudding is a great snack and breakfast option. It only takes 15-20 minutes to prepare and can also be made the night before.

Visit my post on 12 Reasons to Love Chia Seeds to learn more about the great health benefits of chia seeds.

Ingredients

Basic Recipe

3 Tablespoons chia seeds

1 cup almond milk, or milk of choice (recipe for almond milk here)

A few pinches of ground cinnamon

Additional Ingredients for Chocolate Flavor

1/2 Tablespoon raw cacao powder

1/2 Tablespoon coconut sugar, raw honey, or grade B maple syrup

Procedure

  1. Place all ingredients in a bowl and whisk for about 30 seconds. Let sit for 15-20 minutes until it reaches desired consistency. Add desired toppings or enjoy as is.

Serves 1


Green Superfood Granola

IMG_6972.jpg

This granola is one of my favorite treats. It is grain-free, gluten-free, low in natural sweetener, high in healthy fats, and packed with energy boosting ingredients. It won't give you that sugar crash other granolas and cereals may give you due to their high amounts of refined sugars and oils. I sweetened this green granola with coconut sugar, which has a low glycemic index and won't spike your blood sugar. So what makes it green? Spirulina powder (Click the link to see the brand I buy). Spirulina is a nutrient-dense superfood that has great health benefits and is a great supplement to a healthy diet. Spirulina has a strong and overpowering taste, but just a little bit provides great nutrition. The taste can be masked with fresh fruits, vegetables, and healthy fats (add it to your smoothies and you won't even know it's there). Check out my Superfood Ice Popsicle recipe for another nourishing spirulina treat.

Aside from spirulina powder, I also used maca root powder and mesquite powder in this recipe. These are two other 'superfoods' that contain lots of health supporting nutrients even if using small amounts. Both maca and mesquite powders have a nutty, sweet taste to them. I often use them in recipes to add sweetness without having to add an actual sweetener.

This green granola has the perfect balance of bitterness and sweetness to take care of that sweet craving, but also provides a nutrition punch. I crave it all the time but only let myself make it every so often because it's so addicting. Even though it's addicting, it's still good for you compared to store bought granolas. You can enjoy it sprinkled on yogurt, chia pudding, or in a smoothie. Eat it dry as an afternoon snack, or pair it with almond or coconut milk to make a delicious healthy cereal.


IMG_6965


Ingredients

2 cups coconut flakes

1/2 cup chia seeds

1/2 cup raw pumpkin seeeds

1/4 cup raw sunflower seeds

1/4 cup raw sesame seeds

1/4 cup melted coconut oil

2 teaspoons vanilla extract

1-2 teaspoons spirulina powder (I used 2 tsps)

2 teaspoons maca powder (optional)*

1 Tablespoon mesquite powder (optional)*

1/2 - 1 Tablespoon coconut sugar (I used 1/2 Tbsp)

pinch of sea salt

*maca and mesquite powders are optional, but since they add sweetness to the recipe, you might want to increase the coconut sugar a bit if you omit them.

Procedure

  1. Preheat oven to 225 F.
  2. Place all ingredients in a large bowl and mix well.
  3. Spread out on a parchment-lined baking sheet and bake for about 25 minutes, stirring every 10 minutes.
  4. Remove from oven and let cool. Store in a sealed container.

Makes ~3 cups


Pumpkin Spice Smoothie

IMG_7770.jpg

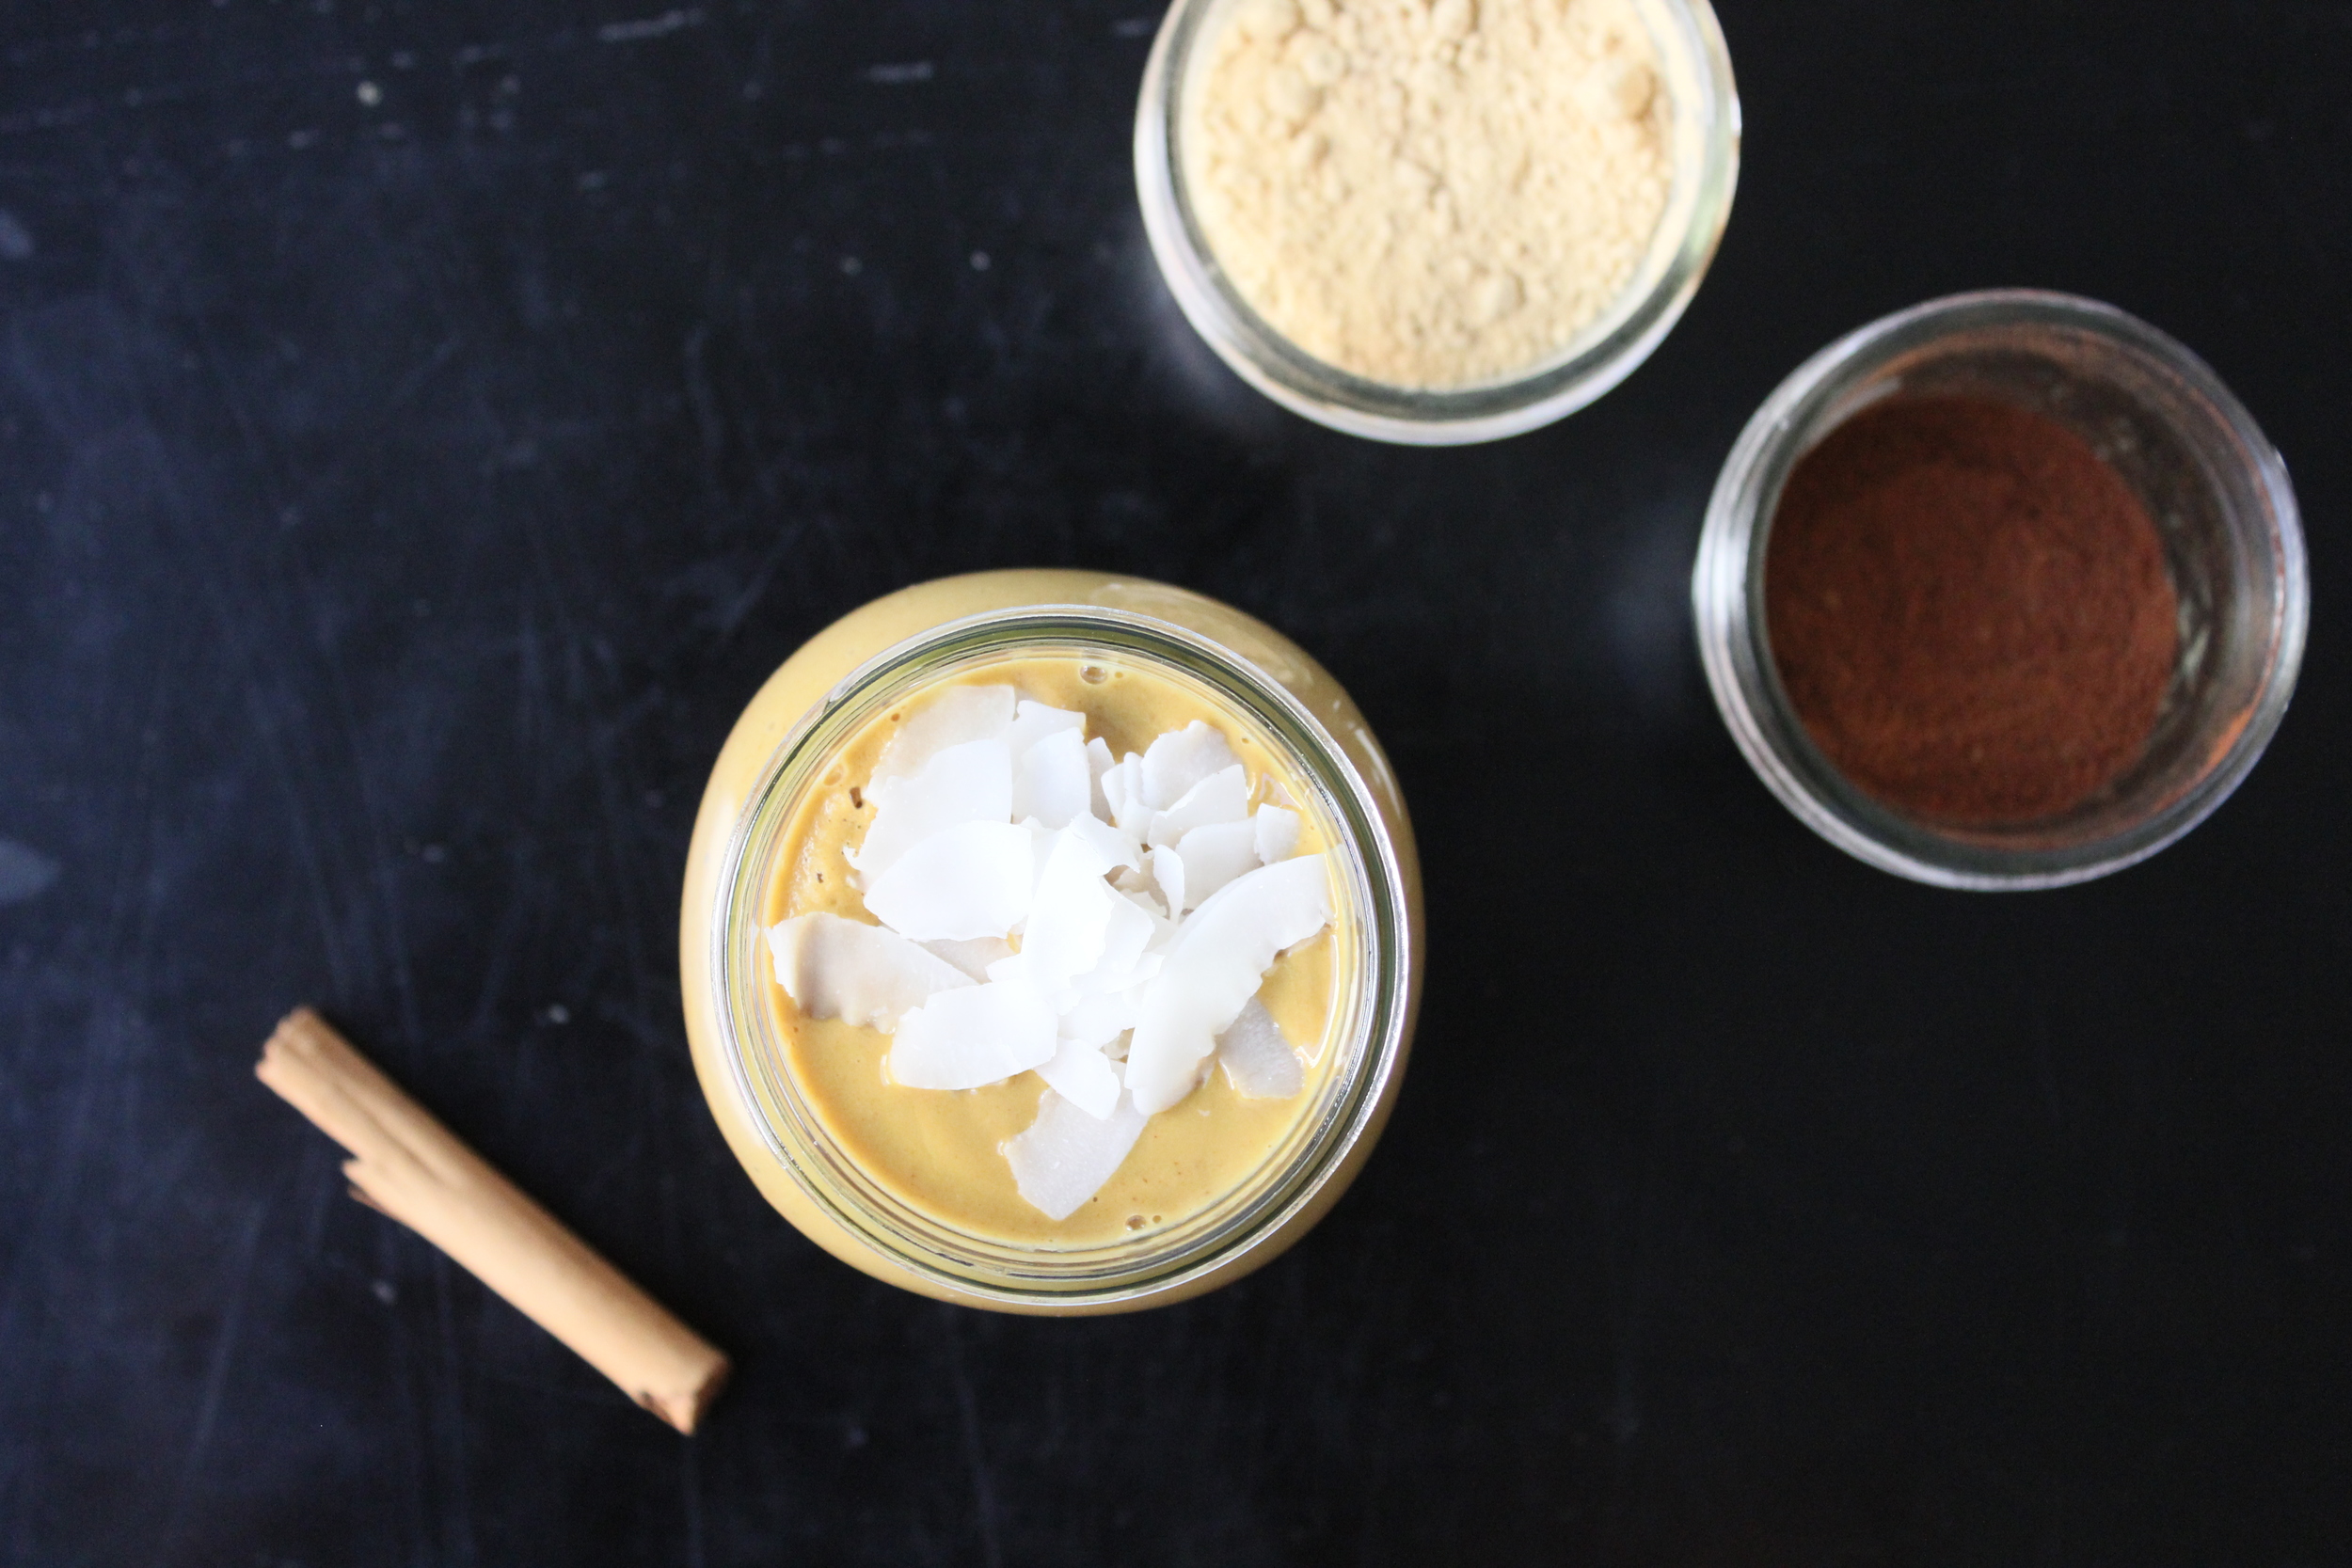
It's about that time. Pumpkin everything! Although I prefer starting my day off with greens, today I decided to switch up my green smoothie for a non-green but still nutrient dense smoothie. Pumpkin spice came to mind. And it was perfect.

Pumpkins are not only delicious and great to bake/cook with, but they also provide good nutrition. They are high in fiber, high in antioxidants, and low in calories which provide health benefits such as: aid weight loss, support immunity, support vision health, and reduce risk of cardiovascular and heart disease.

Here is my version of a pumpkin spice smoothie. Protein is optional, but it is great for stabilizing blood sugar and keeping you full longer.

Ingredients

1 heaping scoop of protein powder (I used brown rice protein powder, unflavored)

1/2 cup pumpkin puree (unsweetened, homemade or canned)

2 medjool dates, pitted (can use a banana to sweeten instead)

3/4 cup coconut water (can use nut milk)

1 Tablespoon sunflower seed butter (can use any nut/seed butter)

2 teaspoons vanilla extractIMG_7766

1 teaspoon maca powder (optional)

1/4 teaspoon cinnamon

1/8 teaspoon nutmeg

1/8 teaspoon cloves

1/8 teaspoon ground ginger

6 ice cubes

Procedure

  • Place all ingredients in blender and blend until smooth. Serve.
  • Garnish with coconut flakes, nuts, seeds, or more cinnamon.

Makes 1 serving


Almond Truffles

Almond-truffles.jpg

Yet another great way to use up your leftover almond pulp after making almond milk. If you don't have almond pulp, you can use almond flour instead. Ingredients

~2 cups Almond pulp, dried out* (or almond flour)

15 medjool dates, pitted

3 Tablespoons melted coconut oil

1 1/2 teaspoons vanilla extract

1/2 teaspoon ground cinnamon

1/2 teaspoon ground ginger (optional)

zest of 1/2 lemon

Procedure

*To dry out almond pulp: Line a sheet tray with parchment paper and spread out pulp on top. Place in oven and turn the oven light on (oven should stay off). Leave in oven with oven light on for about 12 hours or until completely dried out. I place it in the oven in the afternoon and check it the next morning. It should be completely dried out.

  1. Place all ingredients in a food processor and pulse until dates are chopped up and mixture sticks together when pressed. If mixture is too dry, add some water (start with 1 Tablespoon). If mixture is too wet, add more almond flour. Taste and adjust flavoring if needed.
  2. Roll out mixture into small balls (about 1 inch in diameter) and place in the freezer until ready to serve.

Raw Brownies

Raw-brownies_v2.jpg

These raw brownies are simple and delicious. They are gluten-free, dairy-free, and refined sugar-free. They are sweetened with natural sugar from fresh dates. Dates are high in sugar and should be consumed in moderation, but they are a great alternative to refined sugars. Just one is enough to curb a sweet craving, they are a great afternoon snack. Besides their sweetness, they are also a good source of fiber, some B vitamins, magnesium, potassium, and copper.

This is a simple recipe that you can use as a base and add toppings/spices/flavors of your liking. I almost never make the same recipe. I'm always experimenting with different ingredients. My favorites are grated ginger, lemon zest and juice, vanilla extract, protein powder, orange zest, spices, and different nuts and seeds. Anything goes. Get creative.

Ingredients

1 cup medjool dates, pitted

1 cups raw nuts (walnuts, almonds, pecans)

1/4 cup raw cacao powder

1/2 teaspoon cinnamon, optional

pinch of sea salt

Procedure

  1. Place all ingredients in a food processor (can use blender but you will have to move things around with a spatula throughout the process) until dates are finely chopped and mixture sticks together when pressed with fingers. If mixture doesn't stick and is too dry, add more dates.
  2. Press into a parchment-lined baking dish and place in freezer for about 20 minutes.
  3. Cut into 2 x 2 inch squares and enjoy!

Store in refrigerator.