recipe

Vegan Chocolate-Coconut Ice Cream

Choc-coconut-ice-cream-feature-image.jpg

It's not summer yet, but I'm already craving (and testing) all the amazing treats I want to create on those sunny days to come. My first test was this delicious and ridiculously simple chocolate-coconut ice cream. I always thought of ice cream as something that was impossible to make at home. Even using an ice cream maker seemed like a lot of work for me, and I never felt the need to try to make it at home since ice cream is not usually my go-to treat. Then I visited Bi-Rite Creamery in San Francisco and had their chocolate vegan ice cream and life was different. That ice cream is always worth the 30 minute wait. Since trying Bi-Rite Creamery, I knew I had to come up with my own healthy version to avoid indulging again. And that I did.

I still don't have an ice cream maker, but that is not necessary for this recipe. Making vegan ice cream turned out to be very easy. All I used was a blender and a glass container to freeze the ice cream in. The best part is that I only used 4 ingredients and the ice cream is gluten-free, dairy-free, and refined sugar-free. It couldn't be better if you ask me. It's a perfect guilt-free treat or snack for adults and kids.

Please try this recipe and share below how yours turned out. Feel free to substitute pistachios with any type of nut.

Choc coconut ice cream

Ingredients

1 can coconut milk (make sure to use full-fat, otherwise, ice cream won't be creamy)

3 Tablespoons raw cacao powder

1/4 cup coconut nectar or raw honey

1/4 cup chopped pistachios

pinch of sea salt

Procedure

  1. Place all ingredients in blender and blend until smooth.
  2. Pour in glass container or dish and place in freezer for 6-8 hours, until completely firm.
  3. Serve scoops using ice cream scooper (or eat straight from container, which I may or may not have done)

Enjoy!

Sunflower Seed Butter

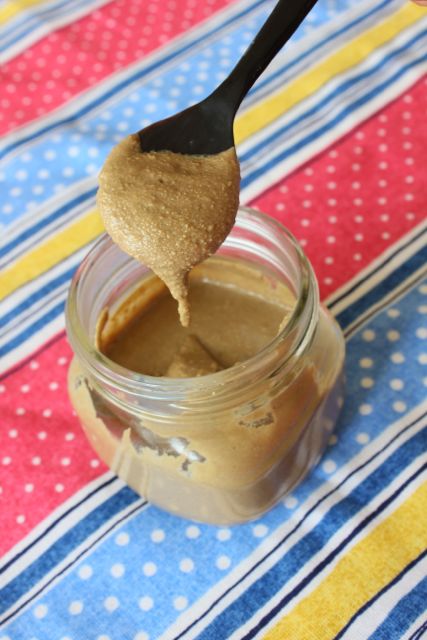
Sunflower-butter-featured-image.jpg

A few months ago I discovered that I am sensitive to nuts. I know, I felt like my life was over, especially since I was the almond butter queen. I had it every single day and more than once. Perhaps why the sensitivity flared. I used to often get bloated and gassy after eating nuts but never thought anything of it since it wasn't every time or I just wasn't aware enough to make that connection. It wasn't until I did a thorough elimination diet/detox (similar to my 3-Day Detox Plan) that I realized that indeed nuts where causing stomach bloating and inflammation. So although they're packed with nutrients and have great health benefits, my body does not agree with them anymore. And that's okay because there are so many other foods that I can get those nutrients and snack fix from. It's just a matter of getting creative, there are always alternatives.

So I discovered this delicious and creamy sunflower seed butter. If you already purchase sunflower seed butter, do yourself a favor and make your own at home. It is so much better than the store-bought kind and doesn't contain refined sugars and other unnecessary additives. Always read your labels.

IngredientsSunflower butter

4 cups raw sunflower seeds

2 Tablespoons melted coconut oil

1 teaspoon pure vanilla extract

pinch of sea salt

Procedure

  1. Preheat oven to 350 F.
  2. Place sunflower seeds on baking sheet and toast in oven for 6-10 minutes, until slightly golden. Check at 6 and 8 minutes. It's important to keep an eye on them because they burn easily.
  3. Let cool for 10 minutes and place in food processor. Process for about 7-10 minutes. The seeds will release their oils and go from a flour, to a crumbly, to a creamier consistency. Be patient, it takes time. At this point, with the processor still running, add remaining ingredients and process until it reaches desired creaminess.
  4. Transfer to jar and keep at room temperature or refrigerated for up 2-3 weeks.

Makes ~ 2 cups

Let me know how yours turns out! Share below or tag me in your picture #apurifiedlife


Balsamic-Glazed Brussels Sprouts

balsamic-brussels-featured-image.jpg

I don't know about you, but I LOVE brussels sprouts. They are currently in season and I just can't get enough of them. There are various healthy ways to cook brussels sprouts. You can roast, sauté, steam, or shred them and use in a salad. I like to roast them and play around with different seasonings.

Balsamic-glazed has been my go-to lately because it's such a simple ingredient that gives them so much flavor. Throw these tasty brussels sprouts on a salad, on a bed of lentils or grains, have with chicken or fish, or have them as a snack.

Ingredientsbalsamic brussels sprouts

1 pound brussels sprouts

1/2 Tablespoon coconut oil, melted

2 Tablespoons balsamic vinegar

pinch of sea salt and black pepper

Procedure

  1. Preheat oven to 425 F.
  2. Remove outer layer of leaves from brussels sprouts and cut in half. Rinse and drain. Place in a baking dish and drizzle with melted coconut oil, balsamic vinegar, sea salt and black pepper. Roast in oven for 15-25 minutes until tender, check at 10 minutes and give them a stir. Serve.

Serves 2-3

3 Minute Green Curry Sauce + Vegetable Curry Dish

curry-sauce-feature-image.jpg

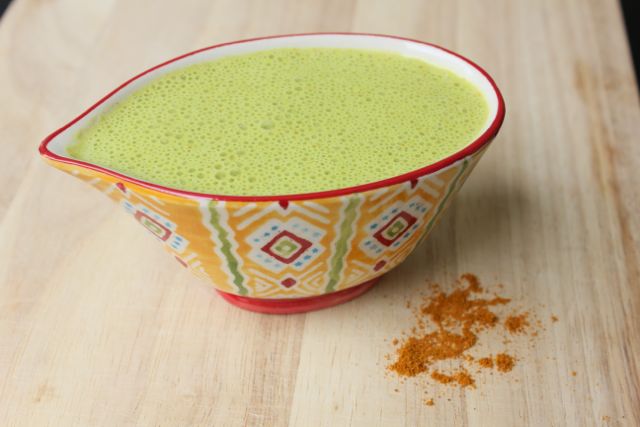
There are many many types of curry sauces out there. I like to keep mine simple, but flavorful. This sauce took me 3 minutes to make and goes great on vegetables, meats, whole grain, and on salads as dressing. I like to make a batch and use it different ways throughout the week. It keeps for about 5 days in the refrigerator. Below is a recipe for my curry sauce and a very simple and delicious vegetable curry side dish (or main dish with the addition of a good quality protein: raw nuts or seeds, grass-fed chicken, pasture-raised eggs, goat cheese).

Curry Sauce

Ingredients

1/2 white or yellow onion, coarsely chopped

1 can coconut milk

1/2 lemon, juiced

1 garlic clove

2 T organic curry powder

handful spinach or basil

sea salt and black pepper

Procedure

  1. Place all ingredients into blender and blend until smooth. The more greens you add, the greener the sauce will turn out and the flavor might change a bit. Play around with it and season to your liking.

vegetable curry dish

Vegetable Curry Dish

Ingredients

1 Tablespoon coconut oil

1 head cauliflower, chopped into bite size pieces

1/2 pound green beans, ends trimmed and halved

1 yellow squash, sliced and halved

sea salt

1/2 cup curry sauce, or more to coat all vegetables

Note: you can use any vegetables you'd like for this dish (carrots, cauliflower, zucchini, squash, sweet potatoes, green beans, broccoli, mushrooms)

Procedure

  1. Heat coconut oil in a medium-size pan. Add vegetables and a pinch of sea salt and sauté until tender, stirring occasionally. Add curry sauce to pan and continue cooking for a few extra minutes until vegetables are cooked through and sauce heats up.

Serves 4-6 


Coconut and Cinnamon Granola

Coconut-Cinnamon-Granola-Fetaure-Image.jpg

I've been on a granola kick lately. It's my current go-to treat, except it's not filled with crap and it keeps my blood sugar stable. It's also gluten-free, grain-free, and nut-free. Of course you can add nuts if you'd like, but I omit them since I am sensitive to them. Coconut & Cinnamon Granola

This recipe in particular is one of my favorites. Coconut and cinnamon make a great combination and are both anti-inflammatory. I personally leave out the sweetener and it tastes just as delicious. Try it out with and without sweetener and let me know what you think. Enjoy this granola for breakfast with non-dairy milk, as a snack, or for dessert.

Ingredients

2 cups coconut flakes (not shredded)

1/2 cup raw sunflower seeds

1/2 cup raw pumpkin seeds

1/4 cup raw sesame seeds

1/4 cup chia seeds

1/4 cup melted coconut oil

1 Tablespoon natural sweetener (coconut nectar, raw honey, grade B maple syrup), optional

2 teaspoons cinnamon

2 teaspoons pure vanilla extract, optional

pinch of sea salt

Procedure

  1. Preheat oven to 250 F.
  2. Combine all ingredients in a large bowl and mix well to coat evenly.
  3. Spread out on a baking sheet lined with parchment paper and bake for 10 minutes. Stir and bake for another 8-10 minutes, until beginning to brown.
  4. Let cool for 15 minutes and store in air-tight container.

Makes ~4 cups

Chia Pudding [Video]

APLChiaPudding1.jpg

If you know me, you know I love my chia pudding. It's a very easy and tasty energy boost. Chia seeds are packed with fiber, omega-3, calcium, protein, and antioxidants. Chia pudding is a great snack and breakfast option. It only takes 15-20 minutes to prepare and can also be made the night before.

Visit my post on 12 Reasons to Love Chia Seeds to learn more about the great health benefits of chia seeds.

Ingredients

Basic Recipe

3 Tablespoons chia seeds

1 cup almond milk, or milk of choice (recipe for almond milk here)

A few pinches of ground cinnamon

Additional Ingredients for Chocolate Flavor

1/2 Tablespoon raw cacao powder

1/2 Tablespoon coconut sugar, raw honey, or grade B maple syrup

Procedure

  1. Place all ingredients in a bowl and whisk for about 30 seconds. Let sit for 15-20 minutes until it reaches desired consistency. Add desired toppings or enjoy as is.

Serves 1


Creamy Carrot-Ginger Soup

carrot-soup-feature-image.jpg

'Tis the season for a warm and comforting soup on a cold or rainy night. Vegetables and fruits have their seasons for a reason. When in season, they provide the most nutritional value, most flavor, and are cheaper. During fall and winter seasons, starchy vegetables are at their peak season to provide warmth and antioxidants that help us fight cold and flu symptoms. Starchy vegetables include: all types of squash, yams, beets, and carrots. Other warming foods include: ginger, mustard, garlic, and onion. To get the most out of your food, make sure you eat a variety of seasonal fruits and vegetables every week.

This carrot-ginger soup is the easiest creamy soup you will ever make. It's dairy-free, gluten-free, and very anti-inflammatory.

Carrot soup

Carrot soup

Ingredients 

1 Tablespoon extra virgin coconut oil

1 medium onion, sliced

4-5 large carrots or 1 bunch of carrots, coarsely chopped

4 cups filtered water or vegetable broth

2-inch piece of ginger root, sliced

Juice of 1/2 lemon

Sea salt to taste

Procedure

  1.  Heat coconut oil in a medium stock pot. Add sliced onion and pinch of sea salt. Cook until onion is translucent, stirring occasionally. Add chopped carrots and cook for another 5-8 minutes. Add sliced ginger and water and bring to a boil. Simmer for about 15 minutes, covered, until carrots are soft.
  2. Carefully transfer everything to a blender and blend until smooth (You may have to do this in batches if it doesn't all fit). Tip: Take off plastic part of blender lid and cover with a towel to avoid spilling. Place hand over towel before starting blender.If you leave the cap on, the soup will overflow because it is too hot.Once soup is blended completely, add lemon juice and pinch of sea salt. Taste and adjust as needed. Serve.

Serves 4-6

Spicy Chai

chai-feature-image.jpg

I recently learned that the word 'chai' means 'tea' in India and other parts of the world. I realized how little I knew about the beverage and what it did for me so I did some research. Here's a brief description: Chai is a drink that contains black tea, a combination of spices, milk, and a sweetener. The spices vary depending on the region, but they all make up a warming and nourishing beverage. Chai is great for digestive health, supports the immune system, and boosts mood. It is full of antioxidants and is anti-inflammatory (if made with dairy-free milk).

IMG_7894

I've been making this chai on a weekly basis lately and I'm excited to share the recipe with you. This is a bit different from a chai latte since it doesn't contain steamed milk, but it's still just as delicious and has way less sugar than the concentrates that we find at stores and coffee shops. Enjoy it hot or cold.

Ingredients

4 cups water

1-inch piece of ginger root, sliced

2 cinnamon sticks

6 cardamom pods

5 peppercorns

4 whole cloves

1 teaspoon fennel seeds

2 Tablespoons loose leaf black tea (or 3 tea bags)

½ cup milk, unsweetened (almond milk, coconut milk, cashew milk, hemp milk)

½ Tablespoon coconut sugar

Procedure

  1. Grind spices cardamom, peppercorns, cloves, and fennel seeds in spice grinder or mortar and pestle (make your own with a bowl and a rock or back of a spoon).

  2. Place water, all spices, and ginger root in a pot and bring to a boil. Reduce heat and simmer for 5 minutes. Turn off heat. Add tea and let steep for 5-6 minutes. Remove tea.

  3. Add milk and sweetener and mix. Strain and serve.

Makes ~4 cups


Massaging Raw Kale [Video]

IMG_7011.jpg

I know what you're wondering. What the heck does massaging kale mean and why would I want to do that?

Kale is a very powerful leafy green because it's packed with nutrients. But raw kale is tough, fibrous, and very bitter, making it hard to digest. It is recommended to lightly steam, sauté, or massage kale before eating it in order for its fibers to bind better with acids in the digestive tract. The more digestible kale is, the better its nutrients are absorbed. Massaging kale is just a simple way to aid digestion and make it less bitter without having to cook it. Once you've massaged kale, you can use it to make a salad or side dish.

Health benefits of kale:

  • Lowers cholesterol
  • Anti-inflammatory
  • Lowers cancer risk
  • Detoxifies the body
  • High in antioxidants
  • High in vitamin K, vitamin A, vitamin C
  • High in manganese, fiber, copper, calcium, iron, potassium, and tryptophan

How to massage raw kale:

  1. Place chopped raw kale in a bowl. Sprinkle with sea salt and lemon juice and massage with both hands for 2-5 minutes, until wilted and dark green.

Any variety of kale works. You can also get creative and dress it up with other ingredients such as tahini, extra virgin olive oil, avocado, or nut butter.

Source: whfoods.com